From Driftwood to Dreamy: Beach Decor DIYs to Try Today
The Beauty of Coastal Decor
Coastal decor has a magical way of bringing the beauty of the beach right into our homes. With its light hues, natural textures, and a fresh, airy vibe, seaside-inspired design creates a tranquil environment that reminds us of sun-soaked days by the ocean. Whether you live near the coast or are an avid beachgoer, incorporating beach decor into your space can be a delightful journey. One of the most enchanting aspects of coastal decor is that it often repurposes the elements found during beach outings. For instance, I remember a summer day spent combing the shore, collecting beautiful pieces of driftwood and shiny seashells. Each item held a story, waiting to be transformed into something beautiful in my home. Imagine transforming your beach finds into unique decor items! Here are some popular items you can create:
- From Driftwood to Dreamy: Beach Decor DIYs to Try Today
- The Beauty of Coastal Decor
- Gathering Driftwood for Your Beach Decor Projects
- Beachcombing Techniques
- Driftwood Cleaning Tips
- Creating Beach-Inspired Wall Art
- Driftwood Picture Frames
- Shell and Driftwood Mobiles
- Making Seashell Decor for a Coastal Vibe
- Seashell Candles
- Seashell Succulent Planters
- Upcycling Beach Finds into Functional Decor Pieces
- Driftwood Coat Racks
- Beach Glass Vases
- Enhancing Your Outdoor Space with DIY Beach Decor
- Rope-Wrapped Outdoor Lanterns
- Beach-Themed Patio Cushions
- Driftwood furniture that elevates your space
- Seashell arrangements that add a pop of coastal charm
- Personalized artworks that reflect your beach excursions
This blog will guide you through neat techniques for gathering driftwood, creating mesmerizing wall art, making seashell decor, and even upcycling beach finds into functional pieces. Each project not only speaks to the beauty of beach life but also allows you to express your creativity. Let’s dive into the process of gathering driftwood and turning those cherished items into decor that can transport your home to a serene seaside getaway!
Gathering Driftwood for Your Beach Decor Projects
Beachcombing Techniques
Now that you’re excited about creating coastal decor, the first step is to gather some beautiful driftwood. Beachcombing can be a delightful experience, blending relaxation with purpose. Spend a day at your local beach or a serene lakeside, and remember these handy techniques for finding the best pieces:
- Early Morning Walks: The best time to scour the shoreline is early in the morning, when tides have drawn up new treasures overnight.
- Look for Unique Shapes: Search for driftwood with intriguing shapes or textures. Curvy pieces can add dimension to your projects.
- Check Beneath the Sand: Sometimes, the most beautiful driftwood is buried just beneath the surface. A gentle dig might yield surprising finds!
While beachcombing, it can be so rewarding to discover that perfect piece of wood that speaks to you!
Driftwood Cleaning Tips
Once you’ve gathered your driftwood, it’s essential to clean it properly to ensure it’s ready for use. Having a clean surface prevents unwanted pests and gives the wood a nice finish. Here are a couple of tips to get your driftwood ready:
- Rinse with Freshwater: Start by rinsing the wood with freshwater to remove any sand, salt, or debris. A quick dunk in a bucket works wonders.
- Soak in a Bleach Solution: For deeper cleaning, soak the driftwood in a solution of one part bleach to ten parts water. This will disinfect the wood and help eliminate any mold or unpleasant odors.
- Dry Thoroughly: Before using your driftwood, let it dry completely to prevent any moisture issues later on. A sunny spot works best!
With these beachcombing techniques and cleaning tips, you’re well on your way to gathering beautiful driftwood that will serve as the foundation for your coastal decor creations!
Creating Beach-Inspired Wall Art
Having gathered and cleaned your driftwood, it’s time to unleash your creativity and craft some stunning beach-inspired wall art. These projects not only showcase your personal flair but also serve as beautiful reminders of your seaside adventures. Let’s dive into two popular DIY ideas: driftwood picture frames and shell and driftwood mobiles.
Driftwood Picture Frames
One of the simplest yet most impactful projects you can start with is creating driftwood picture frames. These frames perfectly encapsulate your beach memories. Here’s how to create one:
- Gather Materials: Collect enough pieces of driftwood and a sturdy backing (like cardboard or a thin board) to fit the size of your desired photo.
- Arrange the Wood: Lay the driftwood out on the backing, experimenting with different arrangements until you find one you love.
- Attach: Once satisfied, glue the driftwood in place using a strong adhesive. A hot glue gun works well for quick adherence.
- Insert Photo: Cut an opening for your picture, and you’ve got a rustic picture frame that adds a touch of coastal charm to any wall!
A fun personal touch is to include photos from past beach trips, keeping those memories alive for years!
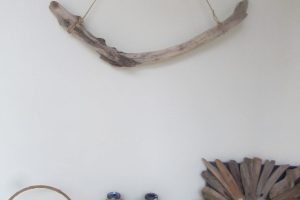
Shell and Driftwood Mobiles
Another delightful option is to create shell and driftwood mobiles. These whimsical decorations sway gently in the breeze, capturing the spirit of the sea. Here’s a simple way to make one:
- Collect Supplies: Gather driftwood, seashells, fishing line, and scissors.
- Prepare the Driftwood: Choose a sturdy piece of driftwood as the mobile’s anchor.
- Attach Shells: Using fishing line, attach seashells at various lengths from the driftwood. Be creative with colors and sizes for an eye-catching display.
- Hang It Up: Finally, add a loop of fishing line at the top for hanging.
These mobiles not only serve as captivating decor but also spark conversations about your beachcombing adventures. With driftwood picture frames and mobiles, you are now well on your way to transforming your spaces with a coastal vibe!
Making Seashell Decor for a Coastal Vibe
With your driftwood projects underway, let’s dive into another wonderful aspect of beach decor: seashell crafts! Seashells evoke memories of lazy days spent on the shore, feeling the sand between your toes. Here are two charming DIY projects that will bring that coastal vibe into your home: seashell candles and seashell succulent planters.
Seashell Candles
Imagine a warm glow illuminating your space, reminiscent of candlelit evenings by the ocean. Seashell candles are not only beautiful but also incredibly simple to make. Here’s a quick guide:
- Gather Supplies: You’ll need seashells (like larger scallop or clam shells), wax (soy or paraffin), a wick, and a double boiler or microwave-safe container for melting.
- Melt the Wax: Slowly melt the wax using a double boiler. For microwaving, use intervals of 30 seconds to prevent overheating.
- Add Wick: Once the wax is melted, secure the wick in the center of the shell using a small amount of melted wax to hold it in place.
- Pour the Wax: Carefully pour the melted wax into each shell, leaving a little room at the top. Let it cool completely before trimming the wick.
These candles can serve as lovely centerpieces on tables or delightful accents in your bathroom!
Seashell Succulent Planters
Next, let’s turn those charming shells into adorable succulent planters! This project is perfect for anyone looking to incorporate low-maintenance greenery into their home. Here’s how:
- Select Your Shells: Choose deep-sea shells, like abalone or larger conchs, as they can hold soil well.
- Add Drainage: Place small stones or gravel at the bottom of the shell to ensure proper drainage, preventing root rot.
- Fill with Soil: Add a cactus or succulent mix to reduce moisture retention.
- Choose Your Plants: Pick tiny succulents that will flourish inside the shells—Haworthia or Echeveria species work great!
- Care Tips: Water sparingly, allowing the soil to dry out completely between waterings.
Not only do seashell succulent planters enhance your decor, but they also bring a touch of nature indoors. Together, these projects capture the essence of the beach—transforming your space into a serene coastal retreat!
Upcycling Beach Finds into Functional Decor Pieces
As you explore the joys of beach decor, consider the beauty of upcycling beach finds into functional pieces that add charm and utility to your home. Not only does this practice promote sustainability, but it also allows you to showcase unique items collected during your beach outings. Let’s look at two creative projects: driftwood coat racks and beach glass vases.
Driftwood Coat Racks
Driftwood coat racks are both stylish and practical, and they can instantly elevate the look of your entryway. Every piece has its unique character, telling a story of its journey across the water. Creating your own coat rack is easier than you might think:
- Select Your Driftwood: Choose a sturdy driftwood piece that has enough length to accommodate hooks.
- Prepare Hooks: Purchase decorative hooks from a local craft store. You might opt for vintage-style hooks to enhance the rustic look.
- Assembly: Start by securing the driftwood to a sturdy backing, like a piece of plywood. Attach the hooks evenly spaced along the wood using screws or strong adhesive.
- Finish and Hang: Finish with a clear sealant to protect the wood, and hang it at a height appropriate for your family.
The end result? A beautiful piece that not only organizes your coats but also serves as a stunning focal point.
Beach Glass Vases
Another fantastic way to turn beach finds into decor is by crafting beach glass vases. These vases beautifully catch the light and make perfect flower holders. Here’s how to create one:
- Gather Beach Glass: Collect smooth, colorful pieces during your beach walks. Choose a blend of sizes and shapes for visual interest.
- Choose Your Container: Pick a mason jar, glass bottle, or even a driftwood base to hold your beach glass.
- Fill the Container: For a simple project, layer beach glass inside the jar to create colorful displays.
- Add Flowers: Place a small dish of water or insert a floral foam block to hold flowers upright.
These vases can brighten up any room, making them a wonderful reminder of your beach outings. Transforming beach finds into functional decor pieces not only showcases your creativity but also adds a personal touch to your home!
Enhancing Your Outdoor Space with DIY Beach Decor
With your indoor spaces beautifully adorned, it’s time to turn your attention outdoors and transform your patio or garden into a tranquil coastal retreat. DIY beach decor can elevate your outdoor ambiance, making it an ideal spot for relaxation and entertainment. Here are two fantastic projects to get you started: rope-wrapped outdoor lanterns and beach-themed patio cushions.
Rope-Wrapped Outdoor Lanterns
Rope-wrapped lanterns are a striking addition to any outdoor setting, providing both functional lighting and a touch of coastal charm. Here’s a simple guide to creating your own:
- Choose Your Lanterns: Start with glass or metal lanterns. You can repurpose old ones or purchase new ones from a local store.
- Gather Supplies: You’ll need jute or sisal rope, a hot glue gun, and some outdoor-safe candle or LED lights.
- Wrap the Lanterns: Secure one end of the rope at the bottom of the lantern with a dab of glue. As you wrap the lantern with the rope, periodically apply glue to keep it consistent.
- Finish It Off: Once you reach the top, cut the rope and secure it with more glue. Add your candles or lights inside.
These lanterns create a cozy atmosphere for evening gatherings and bring a relaxed beach vibe to your outdoor space.
Beach-Themed Patio Cushions
No outdoor space is complete without comfy seating! Beach-themed patio cushions allow you to inject personality into your patio while providing comfort. Here’s how to make or choose cushions that capture the essence of the coast:
- Fabric Selection: Look for outdoor fabric featuring ocean-inspired colors and patterns—think seashells, waves, or beach stripes.
- DIY Cushion Covers: If you’re feeling crafty, sew your own cushion covers. Use existing cushions for size reference, and sew up covers for easy removal and washing.
- Store-Bought Options: Not a DIYer? Many stores offer beach-themed cushions that can easily enhance your outdoor aesthetic.
- Accessorize Further: Complement your cushions with throw pillows in complementary colors for an inviting, layered look.
Enhancing your outdoor space with these DIY beach decor projects allows you to create a charming haven that reflects your love for the coast. With the soft glow of your lanterns and the comfort of themed cushions, evenings on the patio will turn into cherished memories!


