The Ultimate Guide to DIY Wooden Wall Art

Why DIY Wooden Wall Art Is Popular
These days, DIY wooden wall art has captivated the hearts of many, becoming a beloved trend in home decor. People are drawn to the natural beauty and warmth that wood brings into their living spaces. The charm of each handcrafted piece is unique, making it a perfect fit for personalizing homes. Additionally, crafting wooden wall art allows individuals to express their creative side, transforming basic materials into stunning visual statements.
- The Ultimate Guide to DIY Wooden Wall Art
- Why DIY Wooden Wall Art Is Popular
- Benefits of Making Your Own Wall Art
- Getting Started with DIY Wooden Wall Art
- Choosing the Right Wood
- Essential Tools and Materials
- Inspiration and Design Ideas
- Trends in Wooden Wall Art
- Customizing Your Design
- Techniques for Creating Wooden Wall Art
- Basics of Woodworking
- Finishing and Sealing Your Artwork
- Step-by-Step Tutorials
- Simple Geometric Shapes
- Intricate Wood Carving Techniques
- Adding a Personal Touch to Your Wall Art
- Incorporating Photos or Quotes
- Using Mixed Media in Your Designs
- Displaying and Hanging Your DIY Wall Art
- Choosing the Right Placement
- Securing Your Artwork Safely
- Maintenance and Care Tips for Wooden Wall Art
- Cleaning and Dusting Your Art
- Repairing and Restoring Damaged Pieces
Benefits of Making Your Own Wall Art
Creating your own wall art comes with numerous advantages that go beyond aesthetics. Here are a few notable benefits:
- Cost-Effective: Making wall art from wood is often cheaper than purchasing ready-made pieces.
- Customization: Individuals can tailor their art to match specific themes, colors, and personal styles.
- Skill Development: Crafting wooden art helps develop various skills like woodworking and design.
- Stress Relief: Engaging in DIY projects can be therapeutic and a great outlet for stress.
For instance, a friend of mine crafted a wooden mural for her living room, and not only did it fit perfectly with her decor, but it also became a conversation starter for guests. DIY wooden wall art fosters a sense of implementation and pride that mass-produced pieces simply can’t replicate.
Getting Started with DIY Wooden Wall Art
Choosing the Right Wood
Once you’re ready to dive into the world of DIY wooden wall art, the first step is selecting the right type of wood. The choice of wood can significantly influence the style and durability of your artwork. Here are some popular options:
- Pine: Lightweight and easy to work with, making it ideal for beginners.
- Cedar: Naturally resistant to decay, it offers a lovely scent and a warm tone.
- Plywood: Affordable and versatile, it can be great for intricate designs.
- Hardwoods (like oak or maple): More durable and perfect for a polished look, but can be harder to cut.
A personal tip: during my first project, I selected pine without hesitation, and I found it forgiving for my novice woodcutting skills!
Essential Tools and Materials
The right tools and materials are crucial for a successful DIY project. Here’s a basic list to get started:
- Tools:
- Saw (jigsaw or circular saw)
- Drill
- Sandpaper
- Paintbrushes
- Materials:
- Wood of your choice
- Wood glue
- Paint or wood stain
- Protective finish (like polyurethane)
Having these tools on hand simplifies the process and ensures that your creativity flows freely. With the right wood and essential tools, the journey into creating beautiful wooden wall art becomes a delightful and empowering experience!
Inspiration and Design Ideas
Trends in Wooden Wall Art
As you explore the world of DIY wooden wall art, keeping an eye on current trends can spark fresh ideas. Some popular styles include:
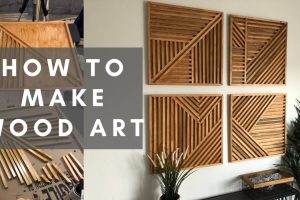
- Geometric Shapes: Clean lines and striking patterns create a modern aesthetic that resonates well with contemporary homes.
- Nature-Inspired Designs: Incorporating elements like trees, leaves, or mountains evokes a sense of tranquility.
- Rustic and Reclaimed Wood: Using reclaimed materials not only adds character but also promotes sustainability.
For instance, I recently attended a local craft fair where a vendor showcased stunning geometric wood panels that complemented the industrial theme of many homes. They were a hit!
Customizing Your Design
The true beauty of wooden wall art lies in the ability to make it your own. Consider these ideas for customization:
- Color: Don’t shy away from bold paints or stains that reflect your personality.
- Personal Elements: Incorporate names, dates, or meaningful quotes to create a one-of-a-kind piece.
- Mixed Media: Experiment with adding textiles or metals for a dynamic texture contrast.
A friend once integrated her family’s initials into a beautiful wooden piece, turning it into a treasured family heirloom. Let your imagination run wild; the only limit is your creativity!
Techniques for Creating Wooden Wall Art
Basics of Woodworking
Getting hands-on with woodworking might feel daunting at first, but understanding some basics can ease you into the craft. Here are a few fundamental techniques to help you get started:
- Measuring and Marking: Accurate measurements are crucial to ensure pieces fit together perfectly. Tools like measuring tapes and square rulers can save a lot of hassle.
- Cutting: Use a quality saw for clean cuts. Practice on scrap wood first to build confidence.
- Joining: Understanding various joining methods—like butt joints, dado joints, or even using wood glue—will enhance your structural integrity.
I remember the first time I attempted a simple wooden sign. I meticulously measured and marked out the design, and the woodworking magic came alive as I sawed through the wood!
Finishing and Sealing Your Artwork
After crafting your wooden wall art, it’s vital to finish and seal it properly. This step not only enhances aesthetics but also ensures durability. Here’s how to do it right:
- Sanding: Smooth the surfaces to eliminate rough edges. Start with coarse sandpaper and finish with finer grits.
- Staining or Painting: Choose either to highlight the wood’s natural beauty or to add color. Test on a small piece first.
- Sealing: Apply a protective sealant, like polyurethane, to shield your art from moisture and wear.
When I completed my first project, the finishing touches made all the difference. Sealing it created a stunning shine that really brought my design to life! With these techniques, your wooden wall art will not only look fantastic but also stand the test of time.
Step-by-Step Tutorials
Simple Geometric Shapes
Creating geometric shapes for wall art is a fantastic entry point for beginners. Not only are they visually striking, but they also allow for creativity without requiring advanced skills. Here’s a straightforward step-by-step guide:
- Materials Needed:
- Plywood or your chosen wood
- Saw (jigsaw recommended)
- Sandpaper
- Paint or stain
- Cutting Your Shapes:
- Use a template or ruler to mark your desired shapes on the wood.
- Carefully cut them out with a saw.
- Sanding:
- Smooth all edges and surfaces with sandpaper to prepare for finishing.
- Finishing Touches:
- Choose your colors and paint or stain your shapes.
- Once dry, arrange them on the wall for a dynamic display.
I created a stunning geometric arrangement in my office, which has added a modern touch to the space!
Intricate Wood Carving Techniques
For those looking to dive deeper, intricate wood carving can elevate your wall art to another level. Here’s how to embark on this journey:
- Materials Needed:
- Basswood or a similar soft wood
- Wood carving tools (whittling knives, gouges)
- Safety gloves
- Design Your Carving:
- Draw your design on paper, then transfer it to the wood.
- Start Carving:
- Carefully carve out sections of your design using different tools for varied textures.
- Finishing:
- Smoothen the carved areas with sandpaper, then apply your choice of stain or finish.
I remember being nervous on my first carving attempt, but seeing my design come to life was an exhilarating experience! These techniques can transform your wooden wall art into a unique piece cherished for years to come.
Adding a Personal Touch to Your Wall Art
Incorporating Photos or Quotes
One of the most rewarding parts of crafting wooden wall art is the chance to add personal touches that reflect your personality or cherished memories. Incorporating photos or quotes into your designs is a fantastic way to achieve this. Here’s how:
- Photos: Print and adhere your favorite photos onto a wooden base using decoupage techniques. A matte finish on the photos before application adds a nice touch.
- Quotes: Choose meaningful quotes that resonate with you or your family. Use stencils or freehand lettering to paint or engrave the quotes onto the wood.
A personal example: I recently created a wood piece featuring a family quote that has been passed down for generations. It has become a focal point in my living room, sparking conversations and nostalgia.
Using Mixed Media in Your Designs
Another fantastic way to customize your wooden wall art is through mixed media. By combining various elements, you can create a rich, layered effect. Consider these ideas:
- Textures: Incorporate fabrics, metals, or even leaves into the design to add dimension.
- Color: Blend paint, wood stains, and other materials to create unique color patterns.
On my last project, I used fabric scraps and acrylic paint, resulting in a vibrant and tactile piece that truly represents my style. Adding layers and different materials invites depth into your art, making it a captivating addition to any space!
Displaying and Hanging Your DIY Wall Art
Choosing the Right Placement
Once your beautiful DIY wooden wall art is complete, the next exciting step is displaying it in your home! Choosing the right placement can enhance the overall aesthetic. Here are a few tips to consider:
- Focal Points: Hang larger pieces in living rooms or entryways to grab attention.
- Synergy with Existing Decor: Place your art near similar colors or styles to create a cohesive look.
- Eye Level: Aim to hang artwork at eye level for optimal appreciation—generally around 57-60 inches from the floor.
For instance, when I hung a geometric wood piece in my dining area, I ensured it aligned with the color of my table, tying the whole room together beautifully.
Securing Your Artwork Safely
Safety and stability are crucial when hanging your wall art. Here’s how to secure it properly:
- Choose the Right Hardware: Use appropriate wall anchors or picture hooks based on the weight of your artwork.
- Stud Finders: If the piece is heavy, use a stud finder to locate the wall studs and secure your art to them for added support.
- Leveling: Always use a level tool to keep your art straight and aligned.
I learned this lesson the hard way when a piece fell after I underestimated its weight! Following these guidelines not only protects your artwork but also ensures it can be enjoyed for years to come.
Maintenance and Care Tips for Wooden Wall Art
Cleaning and Dusting Your Art
To keep your DIY wooden wall art looking fresh and vibrant, regular cleaning and dusting are essential. Here’s how to care for your pieces:
- Gentle Dusting: Use a soft, dry microfiber cloth to gently wipe dust away. This prevents scratches and keeps your art pristine.
- Damp Cleaning: For more thorough cleaning, lightly dampen a cloth with water. Avoid soaking the wood, as excess moisture can warp it.
- Avoid Harsh Chemicals: Steer clear of cleaning products that contain alcohol or ammonia, as these can damage the finish.
I remember neglecting my own pieces for a while, and dust built up, dulling their beauty. A quick dusting revived them instantly!
Repairing and Restoring Damaged Pieces
Even the most cherished pieces may suffer from wear and tear over time. Here’s how to restore your wooden wall art:
- Small Scratches: Use a wood touch-up marker or wax crayon that matches the finish to fill in scratches.
- Loose Pieces: If any parts come loose, reapply wood glue and clamp the pieces together until dry.
- Stains and Water Damage: Sand down affected areas lightly, then repaint or restain.
One of my favorite pieces had a water ring from a plant, but with a little sanding and refinishing, it looked brand new! By following these maintenance tips, your wooden wall art can retain its charm for years to come.


